Maestro 3D Dental Studio V5 - User Manual
Contents |
Software Installation
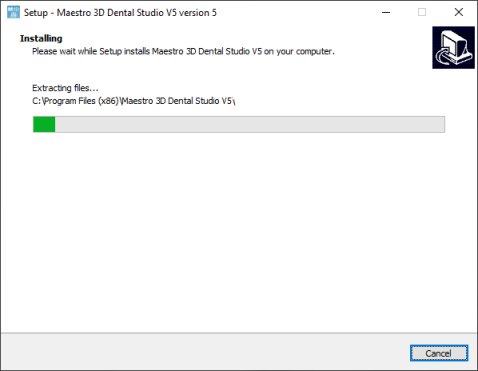
To install the software, run the installation file with administrator rights. In the various phases of the installation process, it will be possible to choose the destination folder, whether or not to add an icon to our desktop, etc. See the image below which shows an installation step.
This operation takes a few minutes.
At the end of the operation, the installation will have created two icons on the desktop ![]()
- Maestro 3D Dental Studio the CAD application;
- Maestro 3D Dental Studio Order Management the software for managing the customer database and creating a new case and opening an existing one;
Administrator rights
To execute the software correctly it is necessary to set the administrator rights correctly. Follow the instructions as shown in the pictures below. Right click on the software icon to activate the contextual menu and select the Open destination folder item.
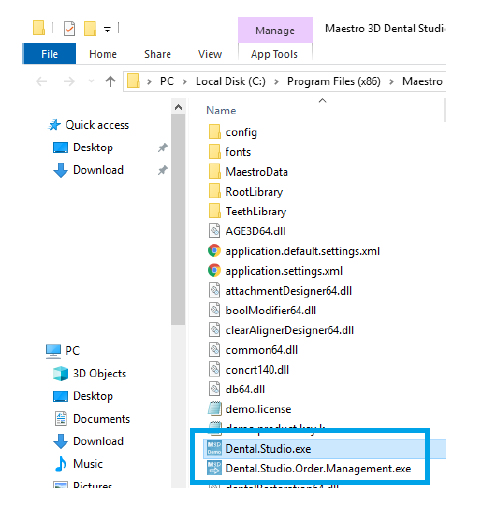
A window will appear showing the contents of the installation folder, as shown in the image below:
For both executables Dental.Studio.exe and Dental.Studio.Order.Management.exe, one at a time, right click to activate the contextual menu and select Properties.
As shown in the figure above, press the Compatibility tab and check the item Run this program as an administrator and press OK to confirm.
As a last thing, right click once again on the software icons on the desktop to activate the contextual menu and select the Properties item.
As shown in the figure below, press the Compatibility tab and check the item Run this program as an administrator and press OK to confirm.
First activation of the license
Before starting check:
- to have an internet connection;
- to have added to the exceptions list of your firewall and antivirus the executable software Dental.Studio.exe and Dental.Studio.Order.Management.exe;
At the first run the software will show a window like this:
- Product Key write the assigned and unique product code for your license;
- Mail write your email to receive confirmation of activation;
- Workstation name write the name you prefer for the workstation;
Press Next to activate the license.
Important notes on the license
The activation procedure, described above, activates the license on the workstation.
It is necessary to repeat the activation procedure each time the workstation is modified or changed. For this reason it is recommended to keep the product code.
The maximum number of workstations that can be activated is 3. However, the license cannot work simultaneously in more than one workstation.
The license, after the first activation, can work offline. The workstation may therefore not be connected to the Internet.
Only for the first activation it is necessary to use an Internet connection.
However, we recommend using the software on a workstation connected to the Internet to check for software updates.


